
Appearance
Absence registration
Time Track Central uses Business Central's standard absence registration, but takes it to the next level.
Free hours (time off) are managed through absence records: they can be credited, corrected, and carried over between years.
Absence balances (Business Central)
Entering, correcting, and carrying over absence balances is done by an administrator in Business Central, not by employees.
Enter initial balance
See BC: Absence Journal — Enter an opening balance for a new year.
Adjust balance
The Absence Journal lets an admin enter (credit), correct (debit), transfer, and pay out (debit) absence hours — see BC: Absence Journal — Correct a balance.
Carryover (year transition)
Carrying balances over into a new year is done by an administrator in Business Central, not by employees — see BC: Absence Journal — Carry balances over into a new year.
Absence summary (free hours)
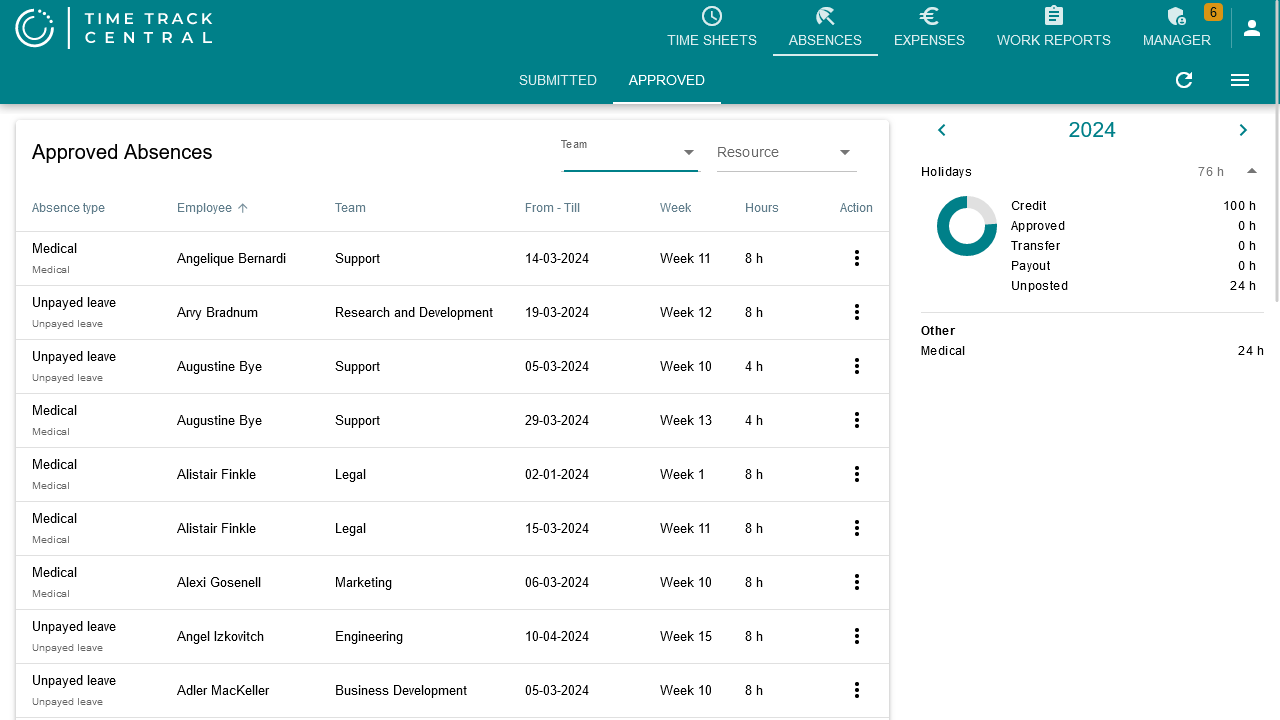
The Absences tab has two sub-tabs, Submitted and Approved (the Submitted one, despite its name, lists open/submitted/rejected requests — see below). Both have a year selector at the top and, next to the request list, a running balance per absence type — shown in days, with the exact hours in a tooltip:
- Credit — hours credited to you for the year (from the BC Absence Journal).
- Approved — hours already approved against that credit.
- Transfer / Payout — hours carried over from a previous year, or paid out.
- Unposted — hours booked but not yet approved.
Absence causes that don't carry a budget (e.g. unpaid leave) are listed separately under Other, with just a running total.
Recording absence
There are two places to book absence, depending on how far ahead you're booking:
Within the current week
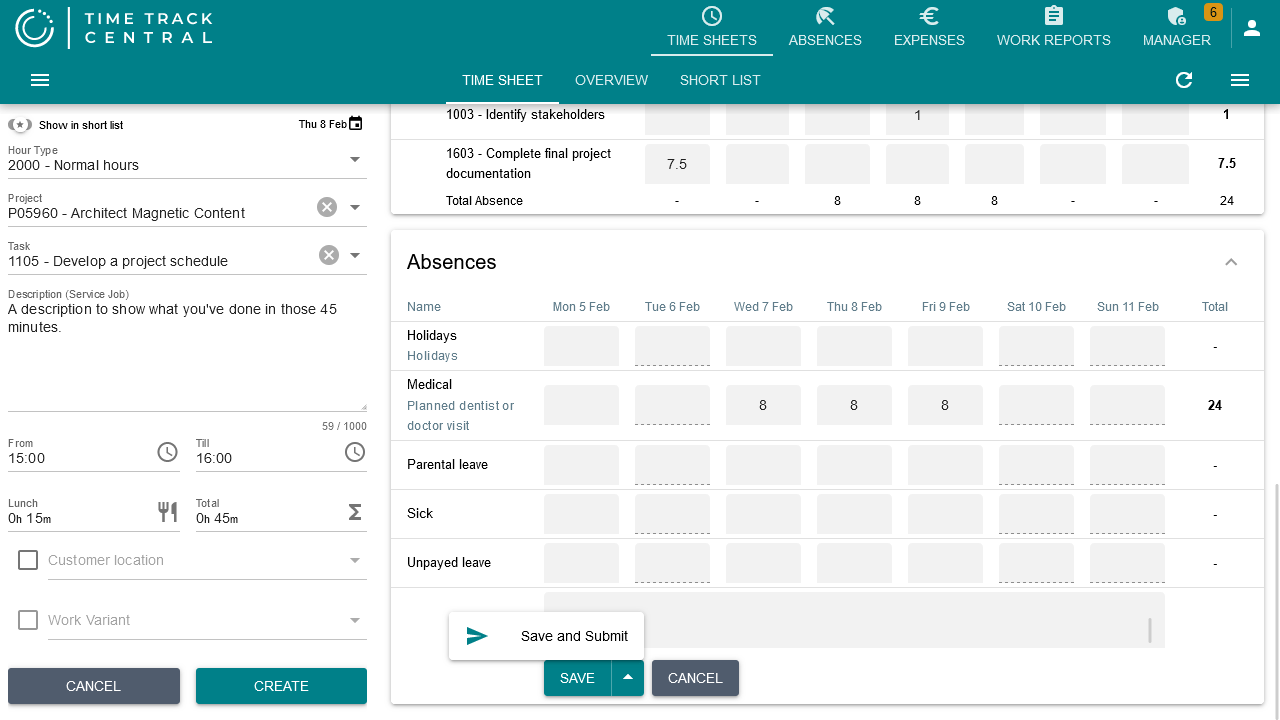
On the Time Sheet tab, the Absences card (below the hours table) lists one row per absence cause, with a column per day of the week. Enter the number of hours directly in the day you want (capped at that day's remaining capacity), add a description if useful, then press Create — or click the arrow next to it and choose Create & submit to send it for approval immediately.
A date range, or a future/past week
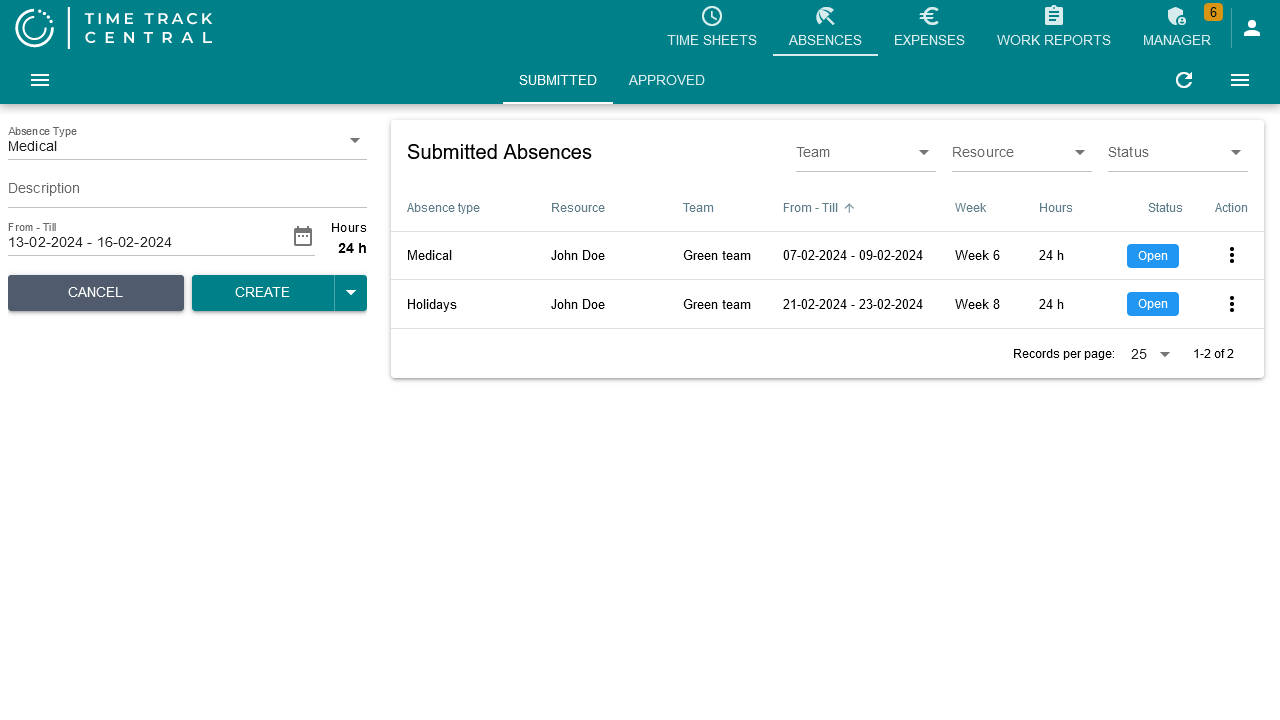
On the Absences tab, select the cause, an optional description, and a from/till date range in the entry panel. The required hours are calculated automatically from your capacity as you pick the dates; if there isn't enough budget left, the panel warns you and blocks submission. Click Submit to create and submit in one step, or click the arrow next to it and choose Create to save without submitting yet.
Filing a saved absence
A request created without submitting (via the arrow's Create option) stays visible in your request list on the Absences > Submitted tab. Press the three dots on its line and choose Submit.
Reopening
A submitted but not yet approved request can be reopened: on the Absences > Submitted tab, press the three dots on the line and choose Reopen. After this, you can adjust the absence.
Approve or reject absences
A submission can be approved or rejected by a manager, from the same Submitted tab (it shows your team's requests too, for admins). Set the Status filter to Submitted to find the ones awaiting action.
On the line of the request, press the three dots and choose Approve or Reject. Rejecting requires a written reason (at least 10 characters).
After a rejection, the employee can edit and/or delete the absence and resubmit it.
Approved absences
Once approved, a request moves off the Submitted tab and onto the Approved tab — a read-only history, filterable the same way.
Causes of absence
The list of absence reasons you can choose from, and whether each one requires approval or draws down a budget, is configured by an administrator in Business Central — see BC: Causes of Absence.
Recurring absences
Recurring absence credits (e.g. a monthly accrual) are set up once by an administrator in Business Central and then apply automatically — there's nothing to configure on the employee side. See BC: Recurring Absence Journal.