
Appearance
Work reports
Work reports can be used to request approval from customers on worked hours. Your hours are only sent this way if your project uses the Work Report approval flow — see BC: Project Types — Approval Flow — in which case you won't submit hours for approval individually; they're bundled by a work report admin into a report that gets sent to the customer instead. The Work Reports tab is only visible to work report admins / global admins, not to every employee.
Finding work ready to report
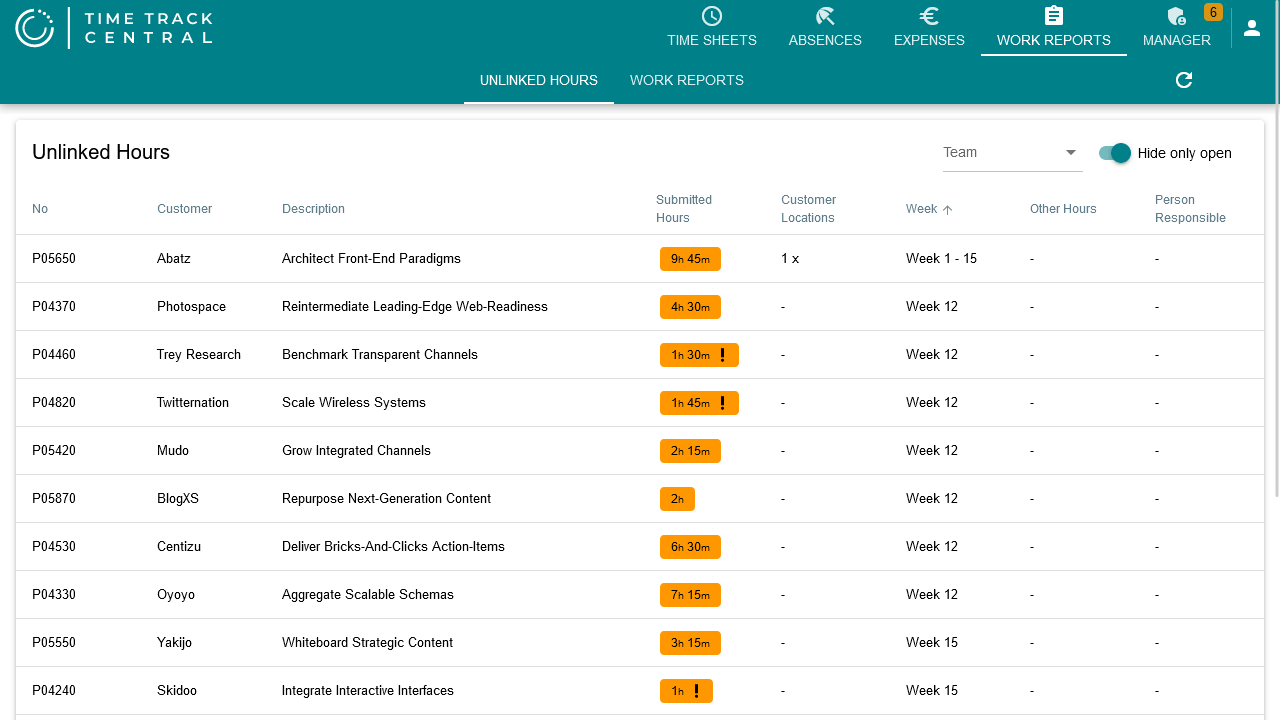
The Unlinked sub-tab lists projects that have submitted hours not yet attached to any report — one row per project, with the submitted hours, other pending hours by status (this week's still-open hours, older open hours, and rejected hours, each as its own colored chip), number of customer locations charged, the week range covered, and the person responsible. A ! on any hours chip means at least one of those hours has a work variant attached — hover the chip for the breakdown. The Hide only open toggle (on by default) hides projects that have nothing but open (not-yet-submitted) hours, so only projects actually ready to report show up.
Click a project's row to start a new report for it.
Creating a report
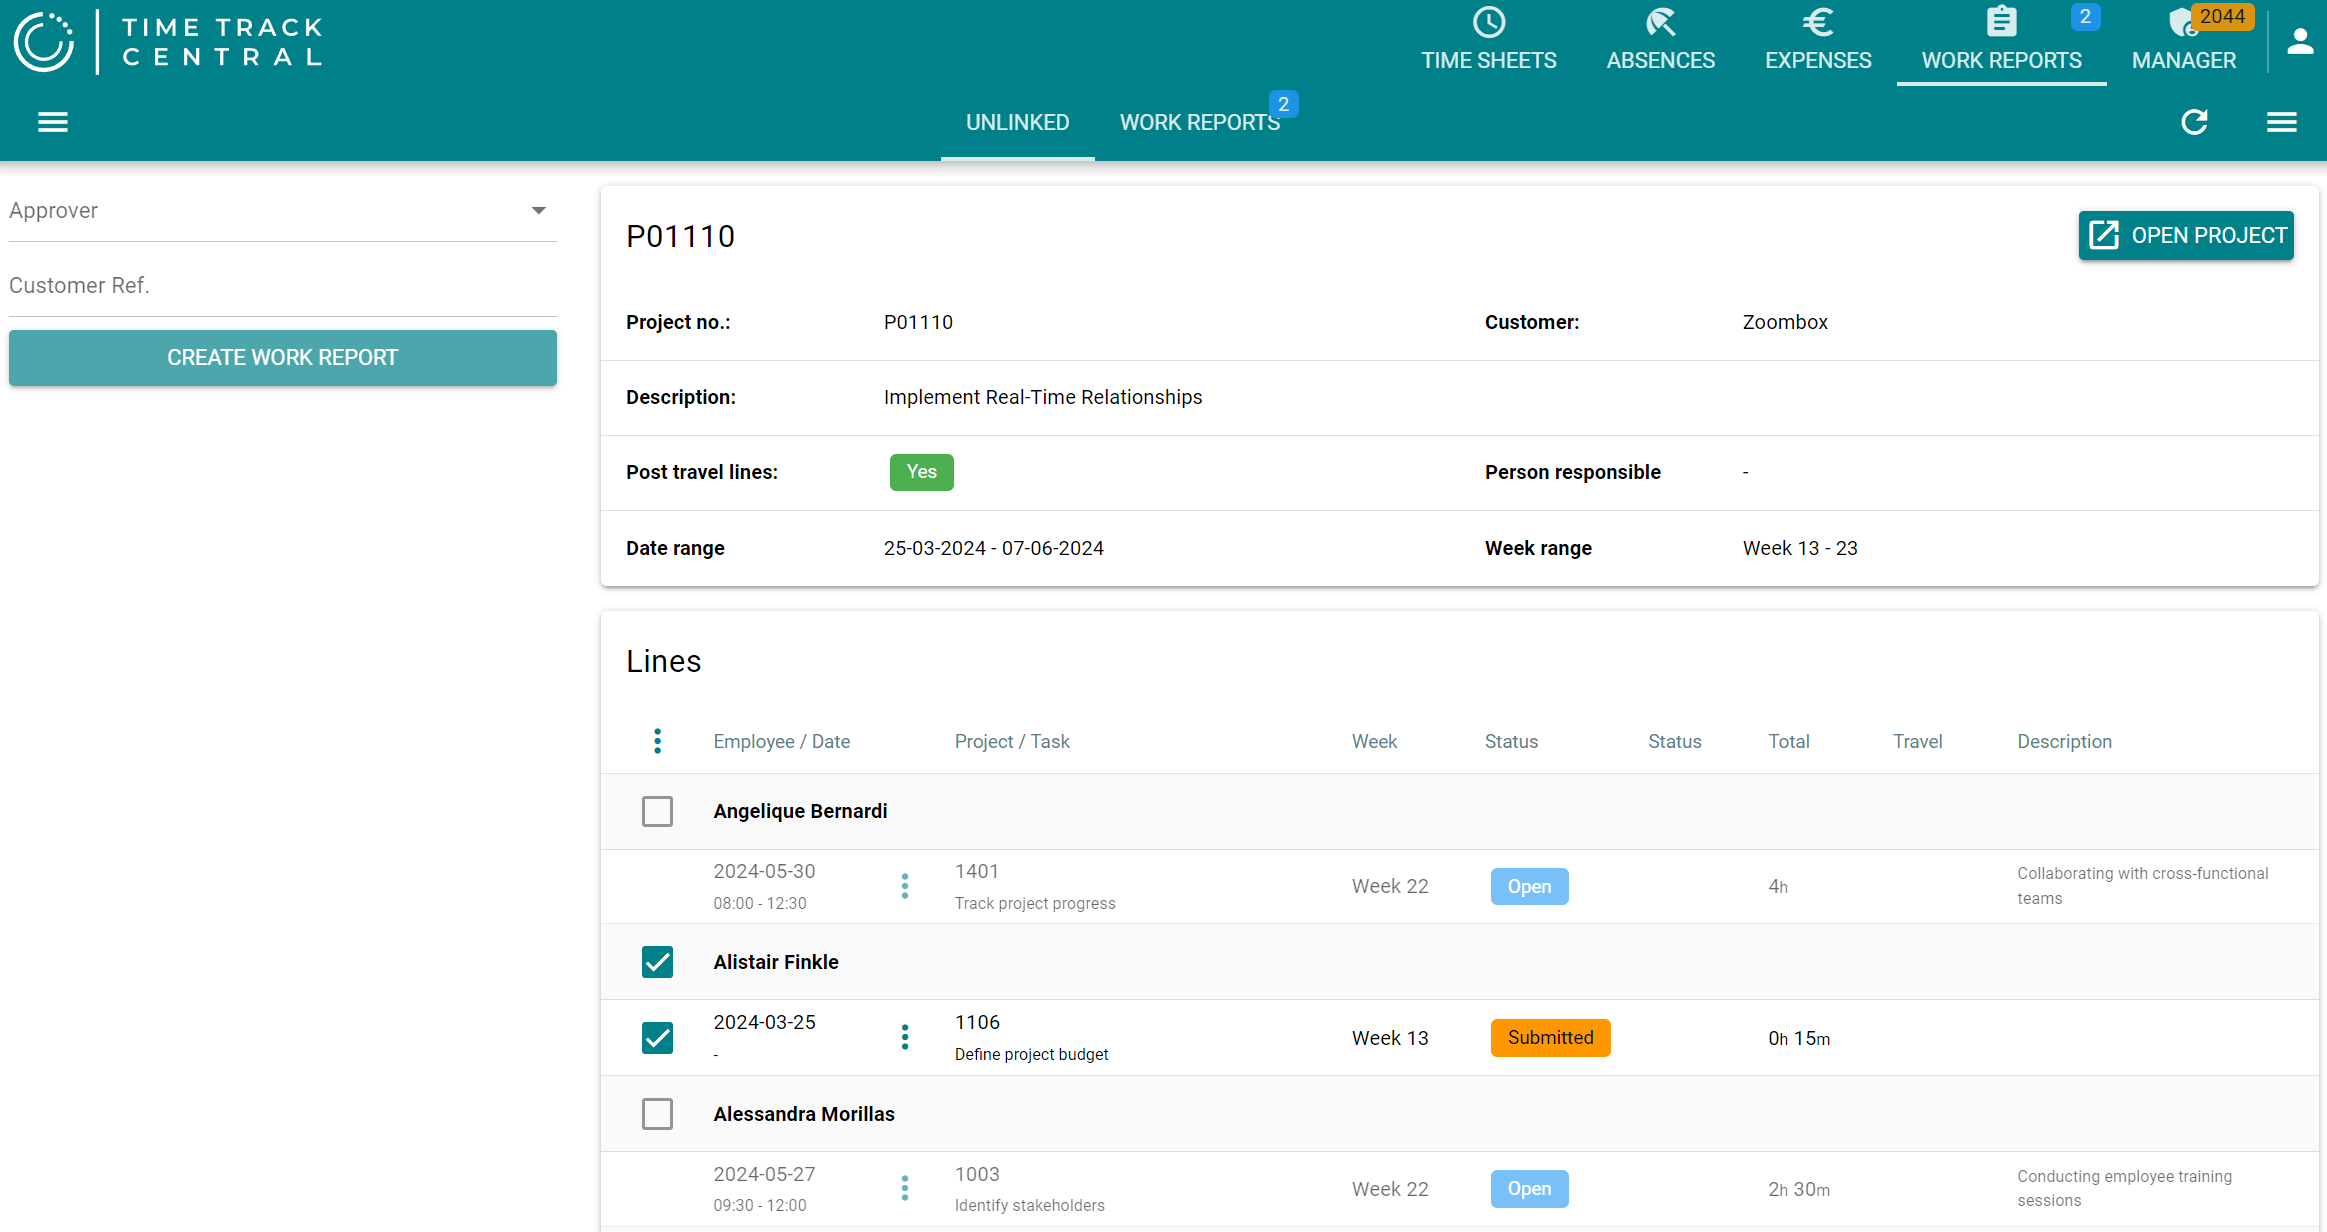
The new-report page shows the project's details (customer, description, whether travel lines are posted, person responsible, date range) and a table of the submitted timesheet lines, grouped by employee. Use the checkboxes to choose which lines go into this report — the ⋮ menu above the table has Select all / Unselect all / Select by date shortcuts, and each line's own ⋮ menu can open its time sheet, or (if there's already another open, unsent report for the same project) add that single line to that report instead of starting a new one.
Once your selection is ready, pick an Approver (a BC contact at the customer) and optionally a Customer Ref., then click Create Work Report. Changing the approver here also offers to update the project's default approver for next time.
Sending and tracking a report
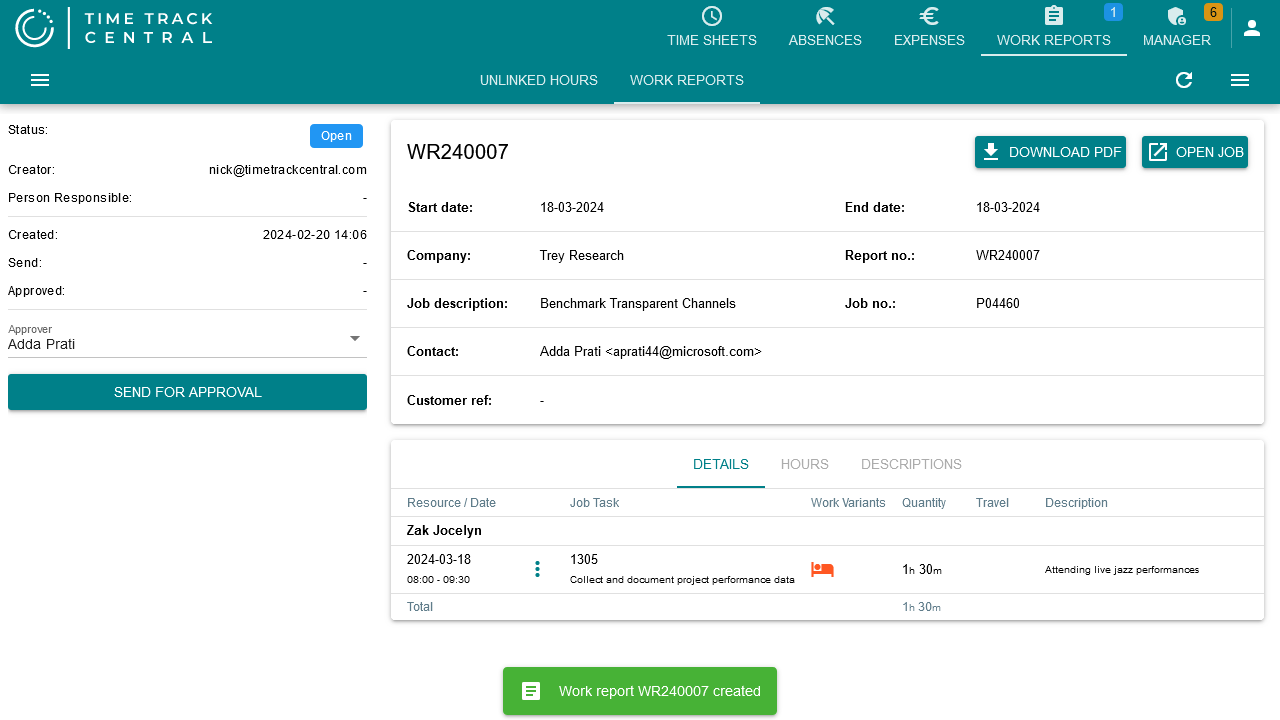
A newly created report is Open — nothing has been sent yet, and it can still be edited or deleted. From the report's page you can change the Approver and click Send for approval to email it to the customer; the report then moves to Sent, and the button becomes Resend for approval if you need to send it again. The customer approves or rejects the report externally, via a link in that email — not by logging into this web app. After that the report shows as Approved, Auto Approved (approved automatically once the report's expiry date passes without a response), or Rejected. Approved hours are later posted from Business Central, at which point the report moves to Invoiced and finally Posted.
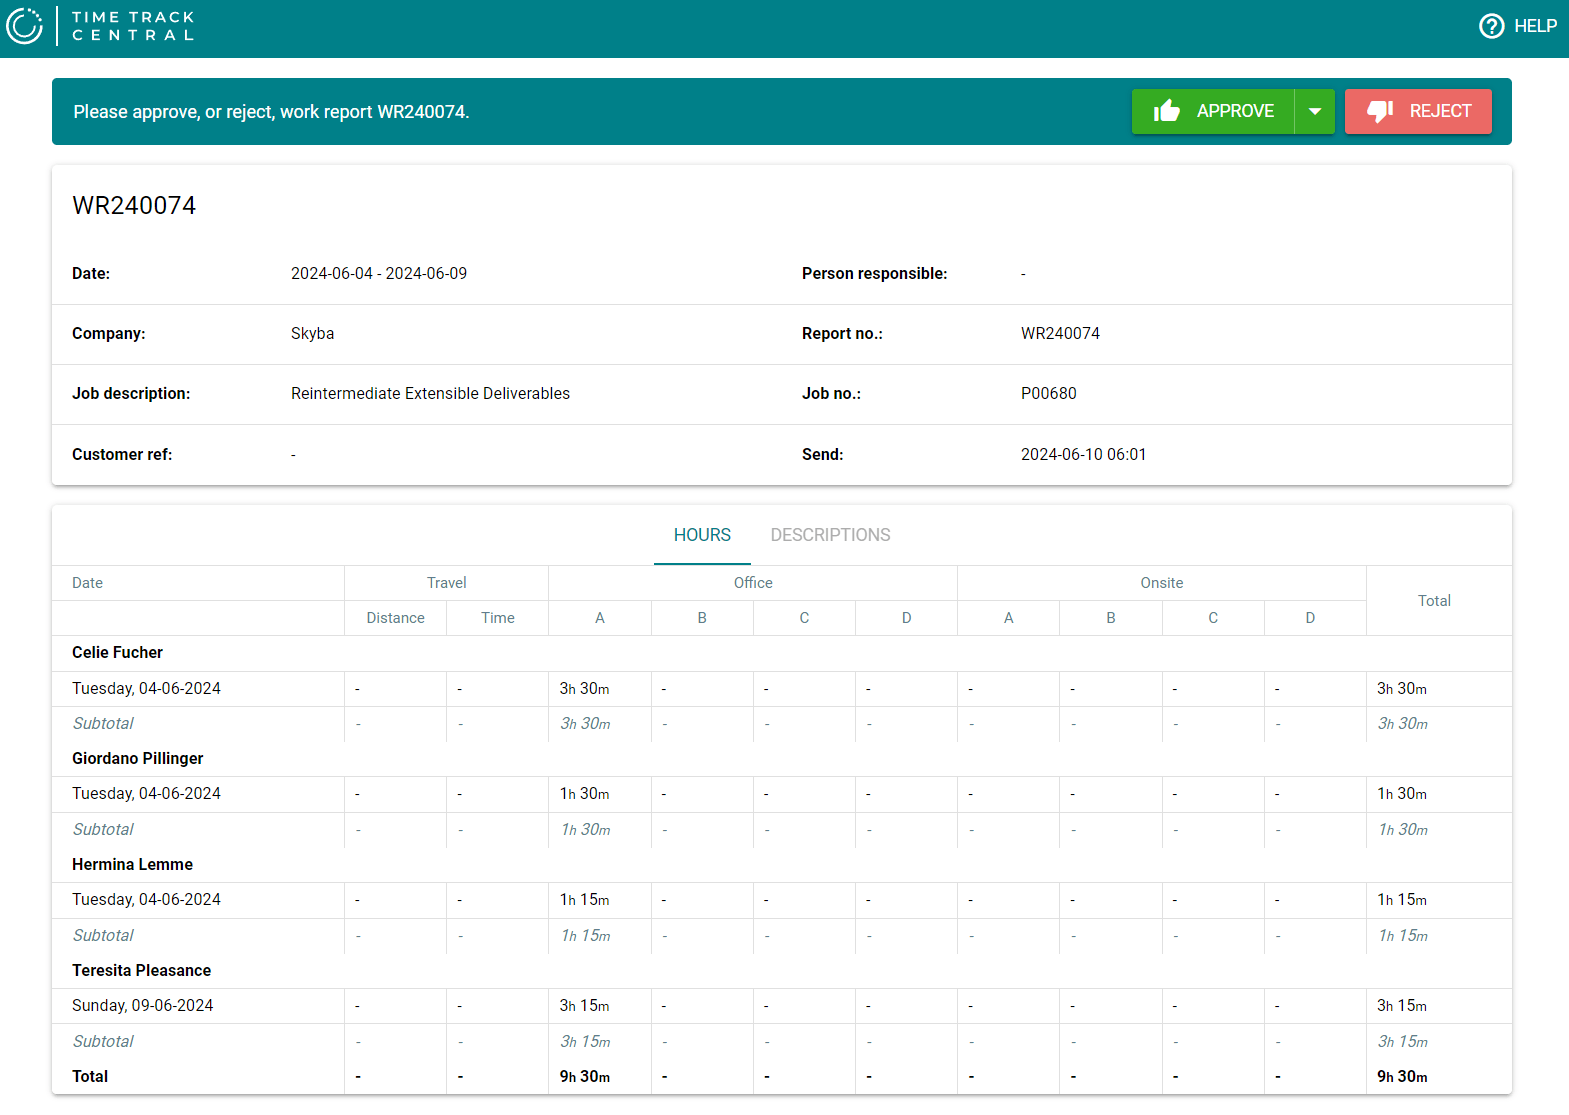
The customer-facing page they land on from that link looks like this — no login required, just Approve or Reject:
All reports
The Work Reports sub-tab lists every report regardless of status, filterable by number, status, approver, customer, and description. Click a row to open that report.